GreenCampGear
Engine Interface Module EIM Plus 630-466 24V Controller for Generator Control EIM630-466 EIM630-089 630-089
Engine Interface Module EIM Plus 630-466 24V Controller for Generator Control EIM630-466 EIM630-089 630-089
Couldn't load pickup availability
- 630-089 EIM (PREVIOUSLY 630-466) Interface 630-466 for gensets 24V - 630-089 EIM is PREVIOUSLY 630-466
Product description
Engine interface Module EIM PLUS 630-466 24V controller for Generator Control EIM630-466 EIM630-089 630-089
Specifications of Engine Interface Module 630-466
How to Install ?
630-088 EIM (PREVIOUSLY 630-465) Interface 630-465 for gensets 12 V 630-089 EIM (PREVIOUSLY 630-466) Interface 630-466 for gensets 24 V
630-088 EIM (PREVIOUSLY 630-465)
630-465 EIM
917-423 EIM
630-089 EIM (PREVIOUSLY 630-466)
630-466 EIM
917-422 EIM
917-530 EIM
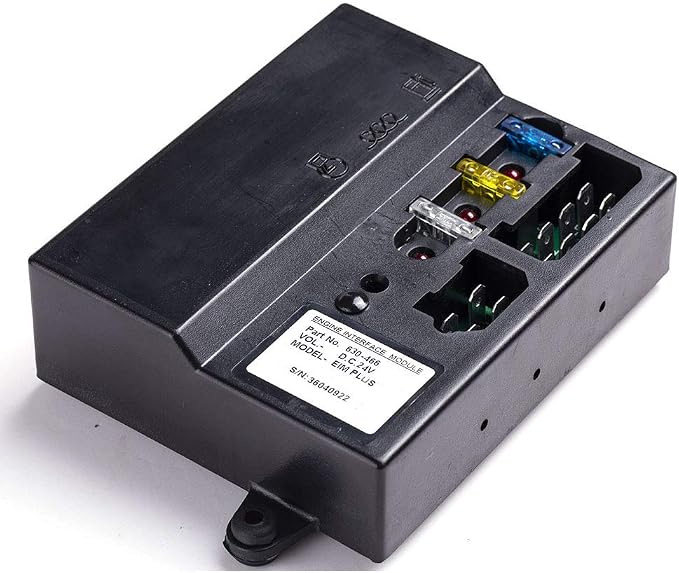
The Interface Module is a sealed engine mounted module that provided switching relays for the starter motor solenoid, glow plug and fuel solenoid.
Each of these circuits is protected with individual automatic fuses mounted in the module. Individual LED’s illuminate when each circuit is energized in addition these LED’s greatly aid when fualt finding.
This module is mounted on the engine with anti-vibration mounts and is easily connected to the engine via loom plugs. Use of the EIM 630-466 PLUS means that heavy currents such as fuel solenoid power are isolated from the control panel thus enabling individual protection of each of the circuits.
Ensure the MPU(Magnetic Pickup) is installed correctly.
Unscrew and pull out the magnetic pickup that is located near the flywheel of the engine
Inspect the magnetic tip and ensure that is it clean and free of debris.
Screw the MPU in until the tip makes contact with the top of the flywheel teeth.
Back out the magnetic pickup 1/2 to 3/4 of a turn.
Turn the ten-turn potentiometer between five to seven turns clockwise or just until you feel a small click-signifying the full span of the pot.
Start the generator set,you will notice the over speed calibration LED illuminated.
Slowly turn the potentiometer counter-clockwise until the LED just turns off.
As soon as the LED turns off,start to slowly turn back the potentiometer clockwise just until the led starts to flicker.
Shipping & delivery
Shipping & delivery
Shipping rates are calculated and displayed at checkout. Processing times and delivery estimates are available in our Shipping Policy.
Returns & support
Returns & support
Questions about an item or order? Our support team is here to help. Please review our Return Policy for complete eligibility and timing details.
Why GreenCampGear
Why GreenCampGear
We bring together practical outdoor finds for campsites, gardens, patios and everyday life outside.
Share